
Motivation
Hostinger is a network custody service provider, providing services such as domain name registration, virtual hosting, VPS and other services. Recently, a domain name was started on Hostinger, and intended to migrate the previous website to the new domain name. I have been using acme.sh to generate an SSL certificate for my website. But hostinger does not provide APIs that can be retrieved by acme.sh, so it is impossible to use acme.sh to generate SSL certificates for domain names on hostinger. Cloudflare is a service provider with content distribution network based on reverse agents, also provides domain name analysis services, and provides API available in acme.sh. So I want to migrate the domain name service provider from Hostinger to Cloudflare.
Migrate Domain Name
Create a Cloudflare Account
First of all, you need to create a Cloudflare account. Just create it directly. There are not many special requirements for the creation process.
Add Domain Name
-
After logging in to the cloudflare account, enter the homepage, click
add a siteon the homepage, enter the domain name, and clickAdd Site.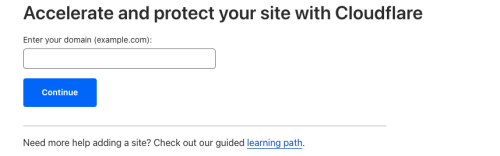
-
Then you need to choose a package. The free package here is enough for me. Click
Confirm Plan, and then clickConfirm.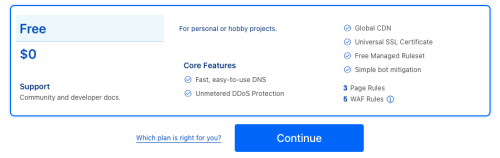
-
Next, Cloudflare scan the DNS record of the domain name, position the domain name resolution server used before your domain name, and then Cloudflare will prompt you to change the domain name analysis server to the cloudflare domain analysis server.
-
Here you need to log in to the account of the previous domain name service provider. For example, I need to log in to the account of the hostinger and change the domain name parsing server to the cloudflare domain name analysis server.Select the domain name you need to migrate, the status of the domain name, and the name of the domain name analysis server, click
CHANGE, and change the domain name parsing server to the cloudflare domain name parsing server according to the prompt given by Cloudflare in the previous step.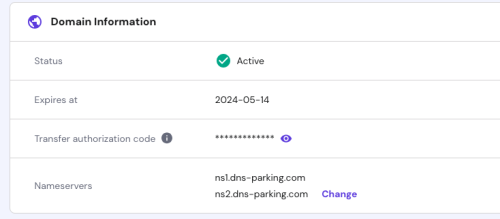
-
After changing the change, click
Done, Check NameServers.Then you need to wait for a period of time to make Cloudflare confirm that the domain name parsing server has been changed to Cloudflare’s domain name analysis server. This process may take several minutes to a few hours. Cloudflare will send an email after confirmation.Essence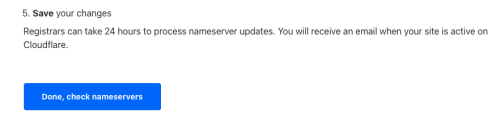
Add DNS Records
-
On the homepage of Cloudflare, click
DNS, and then clickadd recordto add a DNS record.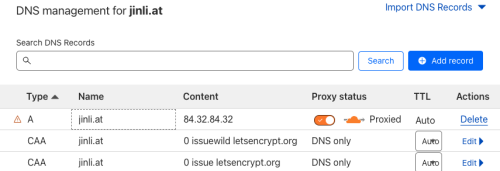
-
Add all the DNS records previously on the Hostinger to the Cloudflare.
Migrate Websites
Generate SSL Certificate
Here we use acme.sh to generate SSL certificates on the website. For installation and use of acme.sh How This Website Was Built 2 – Hugo Framework for Personal Blog Website。
It should be noted that the method of generating SSL certificates introduced in the link above is for Alibaba Cloud, and Cloudflare’s API and Alibaba Cloud’s APIs are not the same. They need to use different account passwords, which are account names (CF_ACCOUNT_ID)., Regional name (CF_ZONE_ID) and passwords (CF_TOKEN).These can be found in the cloudflare account.For the specific process, please refer to acme.sh’s Document.
Here I re-generated the SSL certificates for all websites.
Change the nginx Reverse Proxy Configuration
The previous reverse proxy configuration files were placed in the /etc/nginx/vhost directory. Here I replace all the old domain names in all configuration files into a new domain name. Note that if the SSL certificate is changed in the previous step, the storage of the SSL certificateThe path also needs to change the certificate path in the configuration file to a new path.
Change the docker-compose Configuration
Finally, the old domain names in the docker-compose configuration file that previously built a website are replaced by the new domain name, and then the Docker-Compose service is restarted.
Some issues
Cloudflare’s SSL/TLS Encryption Settings
After the above settings are done, the error of ERR_TOO_MANY_REDIRECTS appears when accessing the website through the new domain name:

This is because SSL/TLS encryption is set to “Flexible” in CloudFlare. Here you need to set SSL/TLS encryption to “Full”:
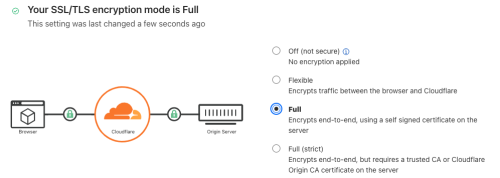
In this way, the previous website can be accessed through the new domain name!