Motivation
When setting up this website, I used the hugo theme [hugo-theme-stack] (https://github.com/caijimmy/hugo-theme-stack), you can add personal resumes on the `page.However, the style of this page is not the style of the traditional resume, but the style of a blog post, which is not in line with my requirements. My requirements for the resume template are:
- The style of the traditional resume, don’t spend a lot of bind
- Can be exported to PDF format
- The size of the size is the size of A4 paper or the size of Letter paper, so that the size of the traditional resume is the same
So I found a resume template that roughly met the requirements on the Internet.The themes are all used, just want to use its resume template. After checking on the Internet, I found [some information] (https://stackoverflow.com/questions/59208233/Hugo-theme-within-another-theme) showing that there is indeed a way to use two Hugo themes on the same website.
Implementation
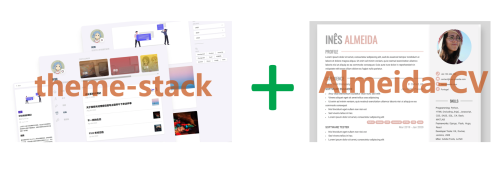
Download the Themes
We need to download two themes, one is [hugo-theme-stack] (https://github.com/caijimmy/hugo-thememe-stack)Ineesalmeida/Almeida-CV).Since I have made some modifications on the Hugo-theme-Stack, I fork Jimmy Cai’s warehouse on Github. My modified warehouse is [hugo-theme-stack] (https://github.com/Jin-Li/Hugo-Theme-Stack).
Enter the root directory of the website, download these two themes, and put them in the Themes folder:
|
|
Some Modifications
-
Modify the Configuration File. First of all, we need to specify two themes in
Config/_default/Config.yaml:1 2 3theme: - hugo-theme-stack - almeida-cvThen merge the settings in the Almeida-CV theme configuration file to the
config/_default/config.yaml:1 2 3 4 5 6 7 8 9 10 11 12 13 14 15 16 17 18 19enableRobotsTXT: true enableEmoji: true params: enableMetaTags: true colorLight: '#fff' colorDark: '#666' colorPageBackground: '#ddd' colorPrimary: '#e3bfb8' colorSecondary: '#aaa' colorIconPrimary: '#fff' colorIconBackground: '#e3bfb8' colorRightColumnBackground: '#f5f5f5' colorRightColumnHeadingText: '#666' colorRightColumnBodyText: '#666' colorRightColumnIconPrimary: '#fff' colorRightColumnIconBackground: '#e3bfb8' pages: 1 swapColumns: false -
New CV Layout.In the theme of Almeida-CV, the style of the resume is defined in the
layouts/index.html. We copy theindex.htmlfile to thelayouts/_defaultfolder, and rename it ascv.html:1cp themes/almeida-cv/layouts/index.html themes/almeida-cv/layouts/_default/cv.htmlThen we delete the
Asseests/SCSS/_custom.scssfile in the Almeida-CV theme.This file was originally an empty file, but it will cover theasseests/scss/custom.scssfile in the hugo-theme-Stack theme, which causes our configuration in Hugo-theme-Stack to be invalid. So we need to delete it. -
Copy Static Files. We need to copy the template static file provided in the Almeida-CV theme to copy the template static file provided in the website to the root directory of the website. There are two files that need to be followed: -
exampleSite/data/content.yamlfile, this file defines the content of the resume, we need to copy it to thedatafolder in the website root directory.After that, we can modify the content in this file to generate our own resume. -exampleSite/static/img/avatar.jpgfile, this file is the avatar in the resume.Since we actually have a avatar in Hugo-Theme-Stack, we can just re-specify the path of the avatar without using this file.For example, the avatar I used in Hugo-Theme-Stack is stored in thestatic/favicon.pngunder the root directory of the website, so you only need to change the path of the avatar in the path of the avatar in thedata/content.yaml. -
Modify the About Page. I want to put the resume on the website “About” page, so I need to modify the “About” page defined by the hugo-theme-stack. The “About” page of the website is defined by the
content/page/about/index.zh-cn.mdfile of the website root directory. We need to specify thecv.htmltemplate defined in the second step,Therefore, the content of the file in theindex.zh-cn.mdfile is:1 2 3 4 5 6 7 8 9 10 11--- title: "关于" date: 2023-08-22 layout: "cv" slug: "about" menu: main: weight: -70 params: icon: archives ---In the Markdown file, you only need to tell the Hugo to generate page to generate pages based on the style of
cv, because the content of the resume is already defined in thedata/content.yaml.
Some Additional Modifications
In fact, with the above modifications, the “About” page of the website has become a resume of Almeida-CV theme, but I have made some additional modifications. The style of the resume is more in line with my requirements.The main modifications include:
- Modify
params: swapColumnsthe fileconfig/_default/config.yamltotrue, so that the left and right columns in the resume will exchange positions. - Modify the style in the resume.
- Modify the semi -transparent watermark in the resume.
- Modify the copyright information at the bottom of the website page and add copyright information of the Almeida-CV theme.
No longer repeated the modification of the code here. If you are interested, you can check my GitHub repository https://github.com/jin-li/almeida-cv.
Final Effect
For the final effect, please refer to the “About” page https://jinli.cyou/bout/ on this website.