Background
Recently, I have been learning to use SQL language, mainly to do LeetCode problems. But since I am a beginner, I am not very familiar with SQL databases, so I often need to debug the SQL statements I write, which requires a MySQL database that I can connect to. Most of the tutorials online are about installing MySQL on Windows, but my usual development environment is to connect to a remote Ubuntu server using VSCode on my MacBook, so I want to install MySQL on Ubuntu and be able to connect to it using VSCode remote.
I have also seen some tutorials on installing and using MySQL on Ubuntu, but most of them are quite outdated, and I have tried many of them and encountered various problems. After a lot of trial and error, I finally configured a MySQL development and testing environment that I can use more comfortably, and I will record it here.
SQL Introduction
SQL (Structured Query Language) is an abbreviation for Structured Query Language, which is a language used for database operations, and is a standard database language used to access and operate database systems. SQL language can be used to access and operate data in a database, as well as to create and modify tables and views in a database. SQL language is a standard database language, and different database systems support SQL language, but different database systems have different levels of support for SQL language, so when using SQL language, you need to pay attention to the differences in database systems. Currently, commonly used database systems include MySQL, Oracle, SQL Server, PostgreSQL, SQLite, etc.
MySQL
MySQL is an open-source relational database management system developed by Swedish company MySQL AB, and is currently owned by Oracle. MySQL is one of the most popular relational database management systems, known for its speed, ease of installation, small size, and low overall cost. MySQL has a paid commercial version, but here we only use the free version for learning database knowledge. If you need a commercial version and have a large amount of data, it is recommended to use Oracle database, which is much faster than MySQL.
Installing MySQL
Installing MySQL on Ubuntu 22 is very simple, just run the following command in the terminal:
|
|
Changing MySQL Account Settings
After installation, only the super user can access the default account, which is very inconvenient. Therefore, we need to modify the MySQL account settings, create a normal account, and then allow us to connect to this database remotely using VS Code.
- First log in to MySQL as a super user:
1sudo mysql -u root - Create a new MySQL account:
Here,
1
2
3
CREATE User 'test'@'localhost' IDENTIFIED BY ''; GRANT ALL ON *.* TO 'test'@'localhost'; FLUSH PRIVILEGES;testis the account name,localhostis the host name allowed to access,*.*means allowing access to all databases and tables, andWITH GRANT OPTIONmeans allowing this account to create new accounts. Then enterexitto exit MySQL. Note: The password here is empty. Because setting a password can also connect to MySQL, but sometimes when running SQL code in VS Code, an error “ACCESS DENIED” may occur, so no password is set here. Of course, sometimes it can run successfully, and I don’t understand why. - This time log in to MySQL as a normal user, specifying the username as
test:Then run the following SQL statement to view the current user information:1mysql -h 127.0.0.1 -P 3306 -u testIf everything went well, you should see output similar to the following:1SELECT User, Host FROM mysql.user;1 2 3 4 5 6 7 8 9 10 11mysql> SELECT User,Host FROM mysql.user; +------------------+-----------+ | User | Host | +------------------+-----------+ | debian-sys-maint | localhost | | mysql.infoschema | localhost | | mysql.session | localhost | | mysql.sys | localhost | | test | localhost | +------------------+-----------+ 5 rows in set (0.01 sec)
VS Code
Installing MySQL Plugin
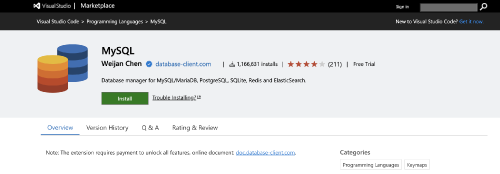
To connect to the MySQL database using VSCode remote, you need to install a MySQL plugin MySQL:
 where
where Host is the hostname of the MySQL database, Port is the port number of the MySQL database 3306, User is the username of the MySQL database test, and Password is the password of the MySQL database. If everything goes well, you can connect to the MySQL database.
Debugging SQL Code
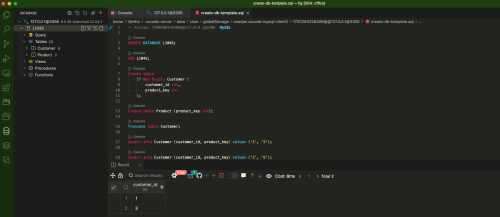
After connecting to the database, create a new file with the suffix .sql, and then enter the SQL code in the file. The Active Connection will be displayed at the top of the file, indicating that the MySQL database has been successfully connected.
There is also an Execute button in front of each line of SQL code, click this button to execute the SQL code on this line. Click the plugin button in the sidebar to see the real-time updated content in the database: