
Background
In the previous article “Learn Web Development with Python (1): Use Flask Framework”, we used the Flask framework to develop a simple web application to display weather information for some cities. But these weather information are hard-coded in the code. If we have a lot of weather information, it is not convenient to hard-code them in the code. Therefore, we need a database to store these weather information, and then read these weather information from the database and display them on the web page.
This article will introduce how to use the PostgreSQL database and SQLAlchemy to operate the database to read weather information from the database.
Prerequisites
Before starting this article, make sure you understand how to use the Flask framework to develop a simple web application. If you don’t know, you can refer to the previous article “Learn Web Development with Python (1): Use Flask Framework”.
PostgreSQL
Introduction to PostgreSQL
PostgreSQL is an open source relational database management system. It is characterized by powerful functions, good scalability, support for SQL standards, support for transactions, support for complex queries, support for multiple programming languages, and support for multiple operating systems. PostgreSQL is one of the most popular relational database management systems, so we choose to use the PostgreSQL database as the database for the backend of the web application.
Install and configure PostgreSQL
-
Installing PostgreSQL on Ubuntu 22 is very simple, just run the following command in the terminal:
1sudo apt install postgresql -
You can use the following command to view the installed version of PostgreSQL:
1psql --version -
After the installation is complete, PostgreSQL will automatically create a user named
postgres. This user is a super user and can be used to manage the database. We can use the following command to switch to thepostgresuser:1sudo su postgresAfter logging in, we log in to the PostgreSQL database in the command line:
1psqlThe following are commonly used commands in PostgreSQL:
\l:List all databases\?:List all commands\c <database_name>:Connect to the specified database\d:List all tables in the current database\d <table_name>:List the structure of the specified table\q:Exit PostgreSQL\du:List all users\du+:List all users and user details\password <user_name>:Change the password of the specified user\conninfo:Display the information of the current connected database
-
Use
\duto list all users, you can see that there is currently only one userpostgres. We need to create a new user to manage our database. Use the following command to create a new user:1CREATE USER test WITH PASSWORD 'test_password';Here
testis the user name, andtestis the password. Then use the following command to grant superuser permissions to this user:1ALTER USER test WITH SUPERUSER;Then use the following command to exit PostgreSQL:
1\qThen use the following command to exit the
postgresuser:1exit -
Then we log in to the PostgreSQL database again with the newly created user
test:1psql -U testYou may encounter the following error message:
1FATAL: Peer authentication failed for user "test"To solve this problem, you need to modify the configuration file of PostgreSQL (refer to https://zhuanlan.zhihu.com/p/467644334). Use the following command to open the configuration file of PostgreSQL:
1sudo vim /etc/postgresql/14/main/pg_hba.confHere
14is the version number of PostgreSQL. If your version number is not14, please modify it to your version number. At the end of the configuration file, you can see the following lines:1 2 3 4 5 6 7 8 9 10 11 12 13 14 15 16# Database administrative login by Unix domain socket local all postgres peer # TYPE DATABASE USER ADDRESS METHOD # "local" is for Unix domain socket connections only local all all peer # IPv4 local connections: host all all 127.0.0.1/32 scram-sha-256 # IPv6 local connections: host all all ::1/128 scram-sha-256 # Allow replication connections from localhost, by a user with the # replication privilege. local replication all peer host replication all 127.0.0.1/32 scram-sha-256 host replication all ::1/128 scram-sha-256We need to change the
peerin the linelocal all all peertomd5, and then save and exit. Finally, use the following command to restart PostgreSQL:1sudo service postgresql restartNow try to log in to PostgreSQL again, and there will be no error:
1psql -U test -
Finally, create a new database for our web application:
1CREATE DATABASE weather_db;Here
weather_dbis the name of the database. Then use the following command to exit PostgreSQL:1\q
Use PostgreSQL in Flask
Install psycopg2 and SQLAlchemy
psycopg2 is a Python library for connecting to the PostgreSQL database, and SQLAlchemy is a Python library for operating the database. We need to install these two libraries. First make sure that we have activated the Python virtual environment, and then use the following command:
|
|
Create database model
-
Connect to the PostgreSQL database in the Flask application, use the following code:
1 2 3 4 5 6 7from flask import Flask from flask_sqlalchemy import SQLAlchemy app = Flask(__name__) app.config['SQLALCHEMY_DATABASE_URI'] = 'postgresql://test:test_password@localhost:5432/weather_db' app.config['SQLALCHEMY_TRACK_MODIFICATIONS'] = False db = SQLAlchemy(app)In the above code, we first import the
Flaskclass and theSQLAlchemyclass, then create a Flask application, and then useapp.configto configure the database connection information, whereSQLALCHEMY_DATABASE_URIis the database connection address,SQLALCHEMY_TRACK_MODIFICATIONSis used to turn off the monitoring of model modifications, because this function will consume extra memory, but we don’t need this function. Finally, we create adbobject to operate the database.Note: The database uses port number
5432here, which is the default port number of PostgreSQL. If the port number used by your PostgreSQL is not5432, please change it to your port number. You can view the port number used by PostgreSQL in the configuration file of PostgreSQL. The path of the configuration file is/etc/postgresql/14/main/postgresql.conf, where14is the version number of PostgreSQL. If your version number is not14, please change it to your version number. -
Then we need to create a database model to use SQLAlchemy to operate the database in Flask. We first import the
SQLAlchemylibrary, and then create adbobject to operate the database. Then we need to define aWeatherclass to represent the weather information of the city. TheWeatherclass inherits from thedb.Modelclass, so theWeatherclass can use thedbobject to operate the database. TheWeatherclass has several attributes, which are similar to the dictionary we defined before. Finally, we need to use thedb.create_all()method to create a database table. This method will create a database table according to the database model we defined. The code is as follows:1 2 3 4 5 6 7 8 9 10 11 12db = SQLAlchemy(app) class Weather(db.Model): id = db.Column(db.Integer, primary_key=True) name = db.Column(db.String(50), nullable=False) country = db.Column(db.String(50), nullable=False) temp = db.Column(db.Integer, nullable=False) feels_like = db.Column(db.Integer, nullable=False) icon = db.Column(db.String(50), nullable=False) description = db.Column(db.String(50), nullable=False) db.create_all()
Use the database in the application
- Previously we used a dictionary to save weather information, and now we change to use the database to save. The code is as follows:
1 2 3 4 5 6 7 8 9 10 11 12 13 14 15 16 17db.session.add(Weather( name = 'London', country = 'UK', temp = '12', feels_like = '11', icon = '10d', description = 'Moderate rain' )) db.session.add(Weather( name = 'New York', country = 'US', temp = '20', feels_like = '19', icon = '01d', description = 'Sunny' )) db.session.commit() - Then we need to read the weather information from the database and pass it to the template. Note that the HTML template previously received an array of dictionaries as a parameter, and now we need to pass an array of
Weatherobjects, so we need to modify the template:The code for getting database data in Python and passing it to the template is as follows:1 2 3 4 5 6 7 8 9 10 11 12 13 14 15 16 17 18 19 20 21 22 23 24<!DOCTYPE html> <html lang="en"> <head> <meta charset="utf-8"> <title>Weather App</title> <link rel="stylesheet" href="{{ url_for('static', filename='style.css') }}" type="text/css"> </head> <body> <section class="ajax-section"> <div class="container"> <ul class="cities"> {% for wd in weather_data %} <li class="city"> <h2 class="city-name">{{ wd.name }}, <sup>{{ wd.country }}</sup></h2> <div class="city-temp">{{ wd.temp }}<sup>°C</sup></div> <figcaption>{{ wd.description }}</figcaption> <img class="city-icon" src="https://s3-us-west-2.amazonaws.com/s.cdpn.io/162656/{{ wd.icon }}.svg" alt="{{ wd.description }}"> </li> {% endfor %} </ul> </div> </section> </body> </html>Here1 2cities_data = Weather.query.all() return render_template('weather.html', cities_data=cities_data)cities_datais a list, and the elements in the list areWeatherobjects. We can use the attributes of this object in the template to get weather information.
Run the web application
Try to run our web application with the following command:
|
|
You may encounter the following error message:
|
|
This is because our application needs an application context. We need to add the following code to app.py:
|
|
The final code of app.py is as follows:
|
|
Then we run the application again:
|
|
If everything goes well, we can see that our website displays the weather information of two cities in two cards:
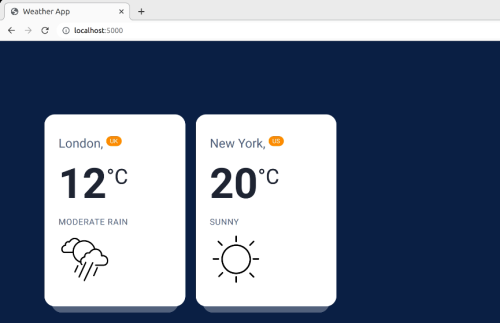
Note: Every time you run the application, two pieces of data will be added to the database, so if you run the application multiple times, it may cause multiple duplicate data in the database, and multiple duplicate cards will appear on the web page. At this time, we can use the following code to delete duplicate data:
|
|
Summary
So far, we have successfully created a PostgreSQL database, and then used SQLAlchemy to operate the database in the Flask application. But the data in the database is still manually added one by one, which is very inflexible and inconvenient. In the next article, we will introduce how to get user input, and then use the API to get weather information based on the city entered by the user, and then save the obtained weather information to the database.