Motivation
I have downloaded a lot of film and television resources before it is placed in the hard disk of the host at home, but it is not convenient to watch it on other places or other equipment.So think of building an online film and television library, you can watch your film and television resources through the Internet anywhere. I saw a lot of methods to build online film and television libraries on the Internet, such as using plex, emby, jellyfin etc. These software are open source and can be built on your own computer or server, and then watch your film and television resources through web or clients.
Many advanced features of [Plex] (https://www.plex.tv/) and [Emby] (https://emby.Media/) need to be paid to be available, and [Jellyfin] (https: ///Jellyfin.org/) is free of charge. Here I choose to use [jellyfin] (https://jellyfin.org/) to build a personal online film and television library.
Prerequisites
- docker and docker compose
- Domain name (second-level domain name is OK)
- acme.sh (generate SSL certificate)
- nginx (reverse proxy)
Preparation
Prepare domain name
For the installation and preparation of the above software and tools, please refer to “Building a Personal Cloud Network Disk using Nextcloud and Docker”
Install Jellyfin
Here we use the docker- compose to install Jellyfin. The specific operation refer to [https://hub.docker.com/r/linuxserver/jellyfin] (https://hub.docker.com/r/linuxServer/jellyfin).
The parameters in docker-compose.yml that can be modified are as follows:
TZ: Time zoneports: Port mappingvolumes: Volume mapping
Here I choose to put all Jellyfin’s configuration files in the Config folder in Jellyfin installation directory.Film and television files are stored in the original hard disk. Here, the folder (such as /Media/Disk8t) that stores film and television files is mapped into the/data/media folder in Jellyfin containers.
Then the specific settings about Volumes are set in the docker-compose.yml file as shown below:
|
|
Initialization and Settings
After installing Jellyfin, you can access the website through the browser, and you can enter http: //0.0.0.0: 8081 in the address bar, if
Nginx has been set up, or you can also access it through the URL: http:// m.jinli.cyou.
You need to set up an administrator account and password for the first time, and then you can enter the management interface of Jellyfin.
Create a Media Library
Then you can create a film and television library to add film and television resources stored on the hard disk to the film and television library.Since we mapped the folders that stored film and television resources to the /data/Media folder when creating the Docker container, we can create different folders in the/Media/Disk8t, and then create the corresponding in Jellyfin.Film and television library.
For example, we created a folder named Movies and a folder called Movies and a folder in the /Media/Disk8t, then we can create a film and television library called my movies and a film called My Music’s music library, and then specify the source path of /data/Media/Movies as the source path of Movies, specify the source path of the source path of `/data/Media/Music/Song.
The method of creating a film and television library is:
- Log in to Jellyfin’s administrator account, click the icon of the three horizontal lines in the upper left corner, expand the menu bar, and then click
dashboard. - Click the
librariesin the menu bar on the left, and then click theadd libraryin the upper right corner. - Select the type of film and television library, such as
music, and then clickNext. - Enter the name of the film and television library, for example,
My Music, and then specify the source path of the film and television library, such as/data/Media/Music/Song, and then clickOK.

Install Plugins
Jellyfin has a lot of useful plug -ins, you can install plugins in the plugins of dashboard.
You need to add the plug -in warehouse address to the plug -in warehouse list of Jellyfin before installing the plug -in. Here are two plug -in warehouses:
- https://repo.jellyfin.org/releases/plugin/manifest-stable.json
- https://gitee.com/jjm2473/jellyfin-plugins-repo/raw/master/manifest.json
It is recommended to install the following plugins:
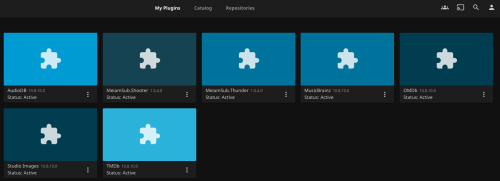
Among them, TMDB and OMDB plugins can be used to obtain information about film and television, such as posters, profiles, etc., and Meiam.Shooter and Meiam.thunder plug -in can be used to obtain the subtitles of film and television.
After installing the plug -in, you need to restart the Jellyfin container to take effect.
Solve the problem of garbled code
When the system and docker container lack the font files specified in the subtitle file, some Chinese fonts will display squares. To completely solve this problem, you need to install Chinese fonts in the docker container and set up a backup font for Jellyfin. After the installation is completed, you need to restart the Jellyfin container to make the font take effect.
Set up a backup font for Jellyfin
The spare fonts in Jellyfin need to use the font of the woff2 format. Here we choose [Microsoft Yahei] (https://www.onLineWebfonts.com/download/e636534076698F5B0EB9BBDC175F77) and [NOTO SANS] (HT TPS: //www.onlinewebfonts.com/download/04219e2F2010127AAA13bb87E6DC50EC) font.
After downloading the font file, you need to put it in the Config folder in the Jellyfin installation directory, and then set the backup font in the Jellyfin’s management interface. The specific operation is as follows:
- Create a folder called
Fontsin theConfigfolder in Jellyfin installation directory, and then place the downloaded font file in theFontsfolder. - Enter the Jellyfin setting interface, click
Playbackon the menu bar on the left, set theFallback Font Folder Pathas/config/fonts.
Install Chinese fonts in docker container
First enter the Jellyfin container:
|
|
Then install the Chinese font:
|
|
Install Chinese fonts for the system
If you need to play videos and display subtitles locally on the server computer, it is best to install a Chinese font for the server system.
This is relatively simple, just download the Chinese font file in the TFF format, and then double -click to install it.It is recommended to install [Siyuan Black Body] (https://github.com/tellarcn/scp_zh/blob/master/fonts/simheii.ttf).